• Godot Help3D
  • What is the best workflow to import multiple FBX Assets into Godot

JayBanana Let's take an example, I have the Synty Battle Royalle assets

Unfortunately, I have no idea about the specifics of Synty Battle Royale.

I can't batch convert them, I have to do this one by one, is this correct?

But this is a terrible workflow for 323 models obviously - there's no batch method to do any of this within Godot that I can see - maybe I'm missing something?

Godot has the option to use scripts when importing assets. But I haven't used this feature yet - so far I haven't needed to import hundreds of objects at a time.

I could of course use Blender and import the 323 models in, add collision shapes and save as GLTF, but for each model I would have to re-add the textures as Blender won't pick them up.

Blender doesn't pick up textures? Perhaps this is a rather specific case and needs a special workflow.

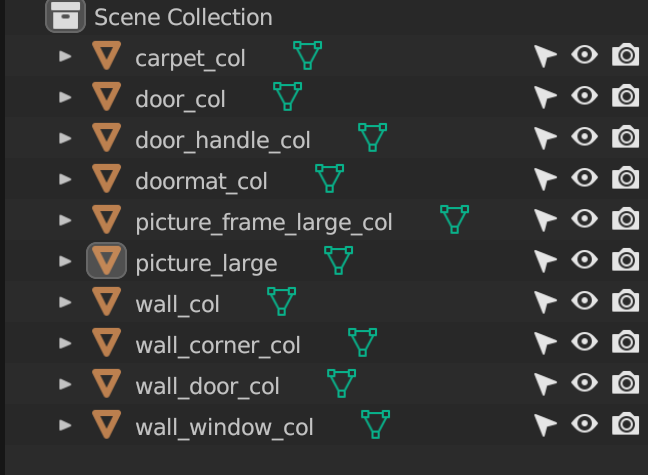
trizZzle If my workflow was to first import the 323 meshes into Blender, I would then have to add the textures manualy, then manually add collision shapes with the suffix as you described, then export as GLTF, then import into Godot. This is a terrible workflow. It's ok if you have a few models, but useless for hundreds.

I don't know how to write a Godot batch script plugin to add box collision shapes to all the meshes.

I have read on Godot's Github there is a request for the feature to automatically add collision shapes when importing with the option for an overide where you may wish to have a more detailed shape for some meshes:

Global option to automatically "Generate Collision" of all meshes of a scene when importing a 3D scene #5955
https://github.com/godotengine/godot-proposals/issues/5955

Also...
New setting Generate Colliders into the Advanced Import Settings dialog #70256
https://github.com/godotengine/godot/pull/70256

At the bottom of the discusion there is a milestone (AThousandShips ) for it to be added, mentions it last week (at the end of October 2023) for 4.2 - 4.3.

Sadly though after looking through the current 4.2 beta it's nowhere to be seen, least I can't find it. If it's going to be included in 4.3, that's a long while away as 4.2 doesn't come out until mid November 2023 from what I understand and 4.3 will be much later on into next year I'd imagine.

Then after that issue there is no thumbnail asset browser in Godot, In my scenario you would have to scroll through 323 mesh names to find the model you wish to add to the scene. I'm aware there is a paid-for plugin for this (Asset Placer - https://cookiebadger.itch.io/assetplacer), but it really should be built into Godot.

I love using Godot, but for 3D it's missing some really obvious core features just now - not sure whether I should stick to Unreal for 3D projects and maybe leave Godot for 2D, I really wish I could use it for both.

    JayBanana Oh I see. Unfortunately I don't have any asset packs to test this. Maybe Kenney has some. I'm interested in this topic too as I find the 3D workflow somewhat confusing.

      @JayBanana So far I wasn't able to reproduce your blender problem. I used Kenney fbx models, but their materials still had textures on them.
      And I don't have any Synty Packs to test.

      EDIT: Ah thanks for the link! Will try. 🙂

      JayBanana If you wish to test some Sythy Assets, there are some free ones on the Unity Asset Store, for example:

      POLYGON Starter Pack - Low Poly 3D Art by Synty
      https://assetstore.unity.com/packages/3d/props/polygon-starter-pack-low-poly-3d-art-by-synty-156819

      I guess you have to register to download them?

      Here is the beginning of the import automation discussion, maybe there is something useful there.

      Gowydot You can try setting it up using the code set_surface_override_material(). Place the code in _ready() script somewhere above your imported node and it will do it for you automatically upon loading.

        Tomcat Yes you have to register and to download them you have use the Unity editor and import them.

        @JayBanana I tested it and get pink textures on all models. The only solution I found was (for those models that share the same material and texture):
        Select one model, on its materials texture slot import the missing texture. Then selected all other models, make sure the previous selected is the active one and then press ctrl+L and chose link materials. This can be done in 2min, but it's annoying that you have to do that. I'm not sure why those textures aren't imported in the first place.

        Tomcat I have seen a script that is meant to add collision shapes, but it was for Trimesh, which is too heavy, essentailly it's as heavy as the model itself. For most 3D collisions meshes/colliders a simple box would be sufficient.

        Additonally, I also seem to have issue importing the standard Synty assets with textures, if I import the whole 3D model/level scene and drop the textures into that folder (same way Mike from gamefromscratch does), all import ok, but when you use the Synty single FBX assets, textures aren't applied.

        I did see a video from a while ago where the assets were first opened in Unity, then exported from there, the textures worked when imported into Godot (maybe they were embedded?). I might try the same with Unreal to see how that goes, although at the same time I feel I'm wasting my time to some degree as it's very inconvenient just to import some assets correctly - these things in Godot really need addressing soon.

        7 days later

        I recently bought the prototyping bundle from synty studios. I also struggled with the fbx files, which caused me to try and find a way to automate converting roundabout 480 files to glb (trying to go to gltf, but still figuring it out), and saving them as blender files. I realized I have to do this in blender. Here's how to do it.
        Make sure you have blender 3.6.4 installed. Then it and go to the scripting panel, create a new script and paste this code in.

        containing_dir is the directory containing all the .fbx files you want to convert.
        save_dir is the directory where you want to save all the files in, as .blend files.
        export_dir is the main directory where you want to export all the files to, as .glb files.
        new_dir is just a directory to seperate the files into different folders. ex. you can point containing_dir to a folder named characters, give that same name to new_dir, then the blender and gltf folder will both have a characters folder.

        import bpy
        import os
        
        
        containing_dir = "D:/my_files/assets/3d/synty_studios/prototype/_SourceFiles/fbx"
        save_dir = "D:/my_files/assets/3d/synty_studios/blender"
        export_dir = "D:/my_files/assets/3d/synty_studios/gltf"
        
        dir = os.listdir(containing_dir)
        
        
        def checkpath(path):
            if not os.path.isdir(path):
                os.mkdir(path)
        
        new_dir="props"
        
        
        checkpath(save_dir)
        save_dir = save_dir+"/"+new_dir
        checkpath(save_dir)
        checkpath(export_dir)
        export_dir = export_dir+"/"+new_dir
        checkpath(export_dir)


        for file in dir:
            if file.endswith(".fbx"):
                # Creating fbx import path
                file_import_path = containing_dir+"/"+file
                
                # Deleting all objects
                bpy.ops.object.select_all(action="SELECT")
                bpy.ops.object.delete(use_global=False, confirm=False)
                
                # Importing new fbx model
                bpy.ops.import_scene.fbx(filepath=file_import_path)
                
                # Preparing file names and save paths
                file_name = file.removesuffix(".fbx")
                save_name = file_name+".blend"
                gltf_name = file_name+".glb"
                
                # Apply transforms
                bpy.ops.object.select_all(action="SELECT")
                bpy.ops.object.transform_apply(location=False, rotation=False, scale=True)
                
                # Saving file as .blend
                bpy.ops.wm.save_as_mainfile(filepath=save_dir+"/"+save_name)
                
                # Saving file as .glb
                bpy.ops.export_scene.gltf(filepath=export_dir+"/"+gltf_name)

        Hope this helps!

          3 months later

          ByteWiseLogic

          I was able to use your script to convert to gltf.
          These are the changes I made to make it work.

          gltf_name = file_name+".gltf"
          ...
          #Saving file as .glb
          bpy.ops.export_scene.gltf(filepath=export_dir+"/"+gltf_name, export_format='GLTF_SEPARATE')